Back in 2014 Google Slides introduced a number of interesting editing features such as cropping, applying masks, and adding borders and Fast Forward to 2022 these features have become linchpins of Slides. As a teacher, you can use these features to apply beautiful visual effects to the images you include in your presentations.
Here are the directions Google provided on how to go about editing the images you use in your Google Slides:
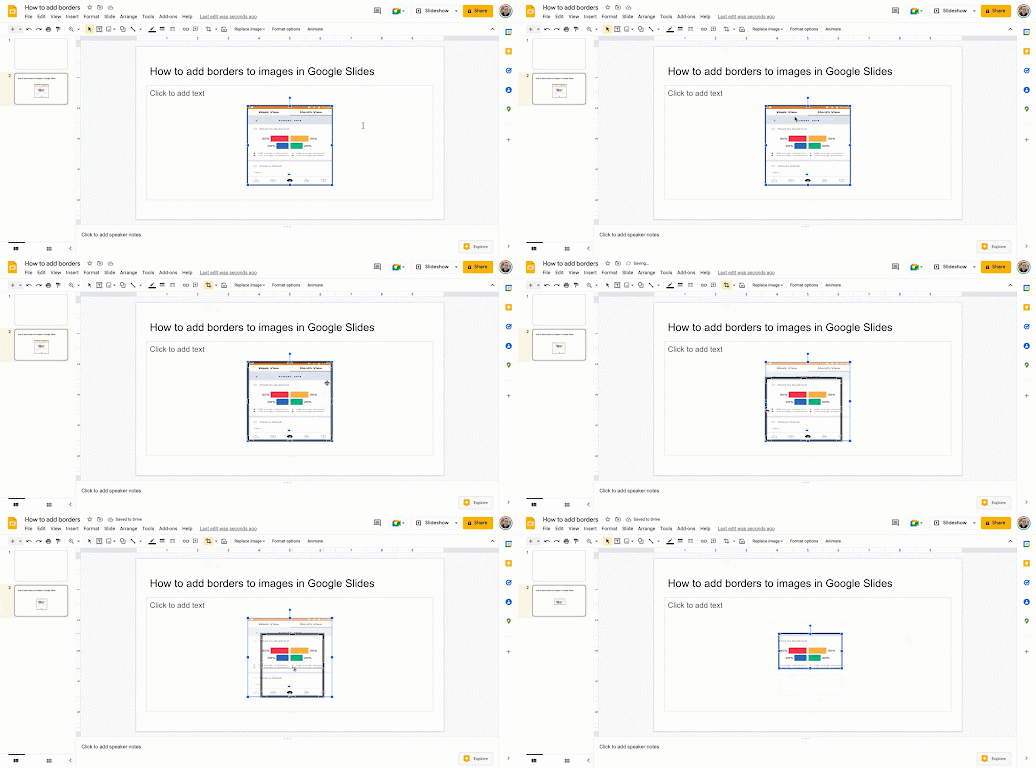
How to crop images in Google Slides?
Here is how to crop images in Google Slides:
- Click on an image in your slide to select it
- Click on the Crop icon and drop the box to your to your liking
- To undo your action select the image by clicking on it then click on Rest image icon
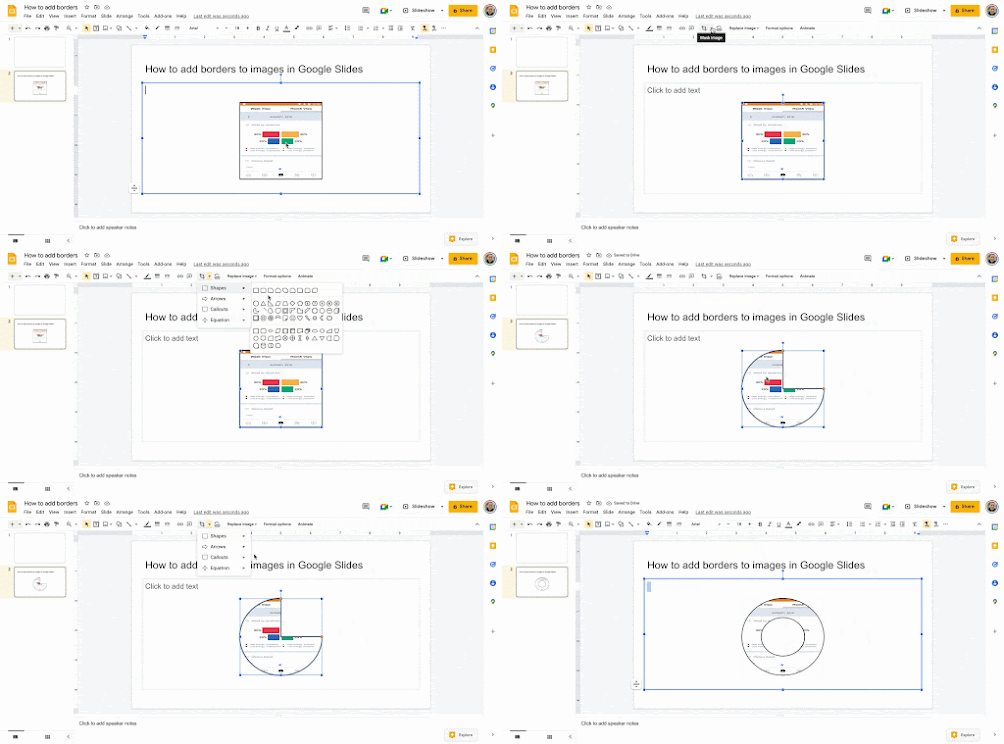
How to apply masks to images in Google Slides?
To crop your image to a particular shape, apply a mask from the pull-down menu next to the crop icon. There are tons of shapes, arrows and callout designs to choose from, like the heart example below.
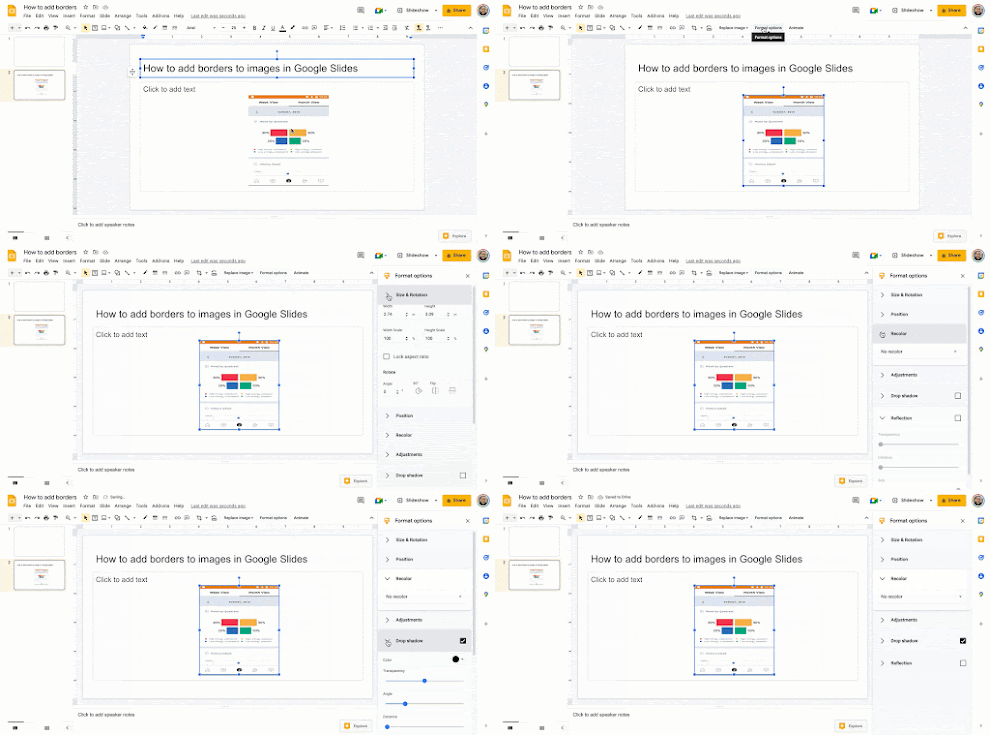
How to add borders to images in Google Slides?
Here is how to add borders:
- Select an image or share in your slides
- Click on Border colour icon
- Select a colour of your choice
- Click on Line weight icon to adjust the border thickness
- To remove the border, click on Border colour and select Transparent.
 |


